Setting Up Record Auditing in UI Builder
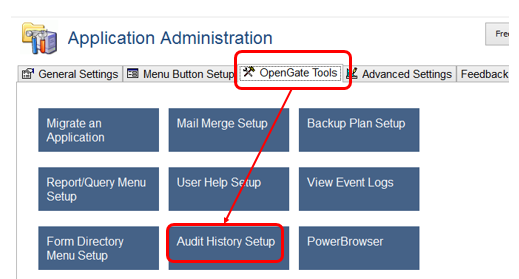
Step 1: Open the Audit History Setup form
Step 2: Choose the table you want to track adds/changes/deletes
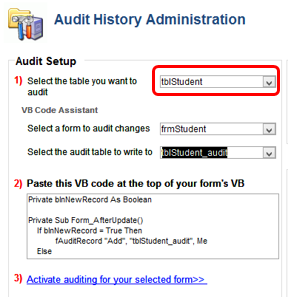
Note that you can add auditing to subforms displayed on a parent form as well. Simply select the name of the subform.
Important
UI Builder auditing cannotsupport multi-value lookup fields. If your table contains a multi-value field an error may occur when trying to create your audit table.
UI Builder auditing cannotsupport multi-value lookup fields. If your table contains a multi-value field an error may occur when trying to create your audit table.
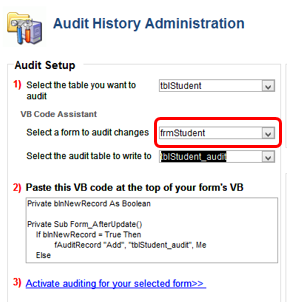
Step 3: Select the form to which you want to add auditing
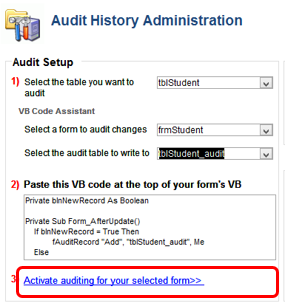
Step 4: Leave the audit table name 'as-is' unless you are an advanced user
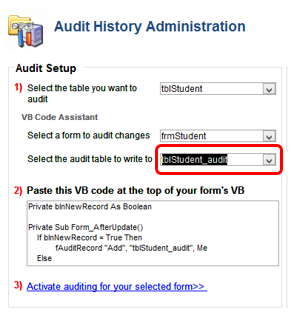
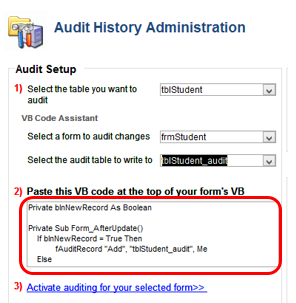
Step 5: Select and copy (Ctrl+C) the VB code provided in the box
Step 6: Open your form in Design view and select the "View Code" button in the Ribbon
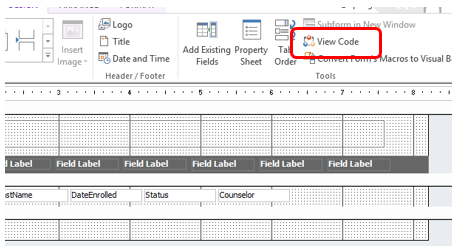
If you are adding auditing to a subform, make sure you paste the VB code into the subform form, not the parent form.
Step 7: The VB Editor will open
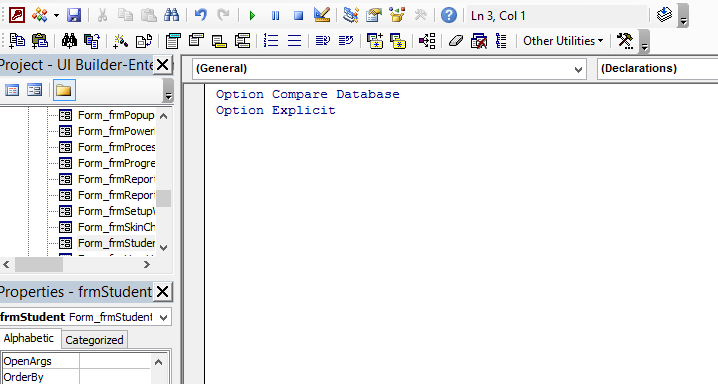
Step 8: Paste the code into the top as shown below using Ctrl+V. The click "Save" to save your changes.
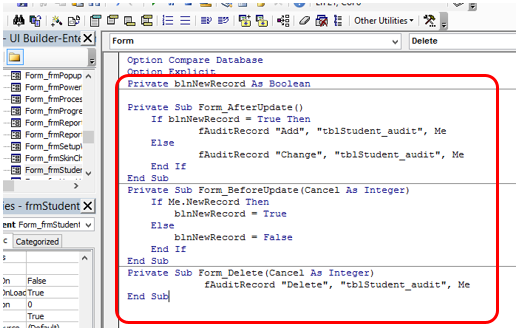
If your form already has code within it, check to make sure there isn't already an event named Form_AfterUpdate, Form_AfterInsert, or Form_AfterDelete. If you do, then you will want to paste the If...Then statement provided by UI Builder into the respective existing VB subroutines. Contact support if you need help.
Step 9: Activate Auditing